

Rayou’s Flexible LED strip 300 surface mounted 3528 LED Chips, that are individually picked by BIN Number in order to have a very steady color rendering in a big production line,operates at 12V,can be DC24V
Features:
3528 SMD 4.5-6.5lm/LED High Quality Flexible LED Strips
1) 60leds/m 5meters/reel; can be cut by 3 LED per unit (DC12V) or 6LED per unit (24V)
And connect again by our accessories.
Input voltage: DC12V/0.18-0.2A/2.2W/M, DC24V/0.18-0.2A/2.2W/M
2) Viewing angle: 120°
3) Available PCB color: yellow; white; black(Special)
Product Information: Item No CCT Λd(nm)/Tc(K) Flux(±5%) LED Qty Watt / ft. Size(MM) RL-W_F12400-60T2 White 5000-6500K 1439lm 300pcs/reel 1.44W/ 120mA 1000*8/10 RL-WW_F12400-60T2 Warm white 2700-3500K 1340lm RL-B_F12400-60T2 Blue 465-470nm 328.4lm RL-G_F12400-60T2 Green 520-525nm 1198lm RL-Y_F12400-60T2 Yellow 585-590nm 482.1lm RL-R_F12400-60T2 Red 620-625nm 135.2lm
1. The above data is under the test condition of Ta =25 degree, DC 12V, 60Led/Meter RH 85%
2. Tolerance of measurement of luminous intensity is ±10%
3. The dominant wavelength λd is derived from the CIE chromaticity diagram and represents the single wavelength which defines
the color of the device.
4. Specifications are subject to change without notice.
5. θ1/2 is the off-axis angle at which the luminous intensity is half the axial luminous intensity.
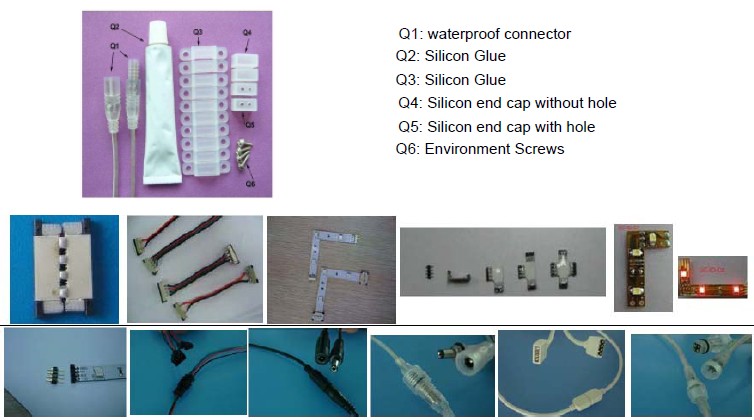
This Flexible Strips can be in waterproof:


All strips come with 3M self adhesive back for easy installation. We recommend that you use hot melt/glass cement or equivalent to be achieve maximum adhesion. Besides in order to be stronger for strips installation and more convenient for our customers, IP67 and IP68 waterproof strips will be fixed with screws and clips. It is easy to help strip installation with our accessories


How to connect waterproof strips:

To cut and seal at one end, please follow the steps: A1 A2 A3 B1 B2
To cut and install waterproof connector at one end, please follow the steps: A1 A2 A3 C1 C2 C3 C4 C5
A1: Cut the light strip at the icon ” scissors” or by every 3 LED's.
A2: Screw to open the glue cap.
A3: Use the thrust (another side of glue cap) to puncture the surface.
B1: Inject the silicon gel into the end cap without holes.
B2: Push the strip into the cap and let gel dry for 1 hour.
C1: Put the connector wire through the end cap holes.
C2: Solder the wire onto the PCB.
C3: after solder the two wires, push the strip into the end cap with wires carefully.
C4: Inject the silicon glue at the end of strip and cap.
C5: Make sure end cap and strip are connected well and let gel dry for 1 hour.

PAR30 LED Light Bulbs
Links: Commercial Lighting UK ![]()